
Building a Shed
The summer started and ended in the blink of an eye. It seems to have faded into memory now as I sit and watch the snow and wind blast past my window. The recent escapades in the garden could not have come too soon. Let me explain.
At the side of the house, I had some years ago stored some old pieces of timber. At that time, I made up a couple of wooden boxes to store my truck tires for each season and I felt that this would suffice. Unfortunately, security led me to think that this was not going to be safe enough as there had been some recent light-fingered people around going into the backyards of neighbors and lifting their respective garden accessories. The time had come to make it a little more secure.
“Research is always a welcome idea,” says the Old Dawg as we chat about it. “An important issue is size, make sure you get the size you want to fit what you need to store!” Seems logical right? I think to myself.
A decision was made with my partner where we had agreed that the size would be an 8-by-6 shed, leaving enough at the side of the home to pass by. We built a level base out of wood to fit. A point to note, make sure when you set the base in place it is in the correct position. I know it sounds rather silly, but I’m sure some people build first and then think, whoops. I would have liked a 7’-by-7’, but I honestly wasn’t sure. Venturing around the local hardware stores we ended up finding – or so we thought – the exact size.
We made the purchase and having loaded into the back of the truck took it home to unload. This was no small feat; the box was completely sodden from being stored outside at the store. Once it fell to pieces it was a slow process of moving each piece little by little to the place for construction. There should be a warning that says buyer beware, metal is often very sharp, be careful out their folks.
The day arrived and once the cameras had been set up the old dawg and I, having agreed what each was going to say, started. The old dawg went on to say that it is always important to ensure all pieces are present and separated making it easier for installation. That was when I noticed the first issue: the shed we had so painstakingly unloaded was the incorrect size! That’s right you read it here, the hardware store had in fact given us a 10’-by-8’ shed, had I the space it would not have mattered, alas I didn’t. What a to do?
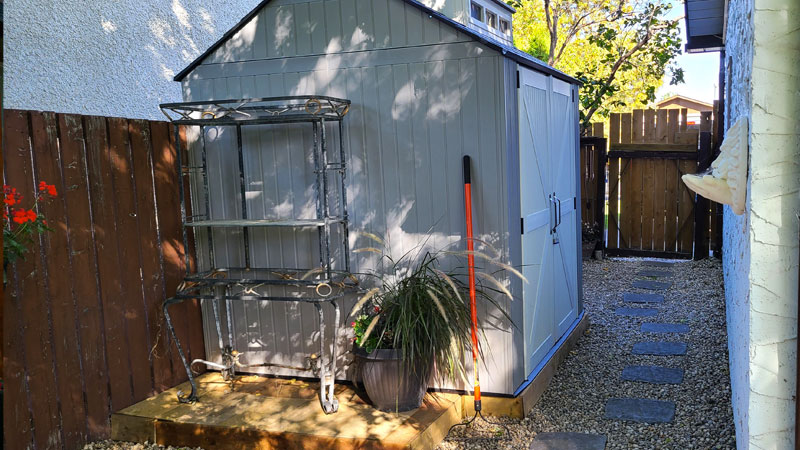
Once contact had been made with the hardware store, who were most apologetic, we returned the unwanted shed, and returned home with another, a 7’-by-7’ Rubbermaid shed. Quickly setting about to increase the size of the small deck by an extra foot, we then set about unloading and construction got underway.
The end result was well worth it. From start to finish it took no more than 4 hours to complete. Costructing the new Rubbermaid shed could not be simpler. Follow each step one item at a time. These sheds click in place much like laminate flooring. You do need an electric drill and socket set for correctly rigging the roof of the shed and doors. And don’t try to put on the roof without another Old Dawg.
You can see the process on the video on our website. Follow the QR code.
What did we learn?
• Always check the dimensions on the box?
• Always have two people complete the build; it is really hard to put the roof on, on your own.
• Make sure that the base or foundation is level and a flat surface.
• Issues can arise, stay calm and relaxed throughout the process.
• Most of all, enjoy your friends, your time and of course, your new shed.


